As a Solidity Developer who started with Remix, I wondered if there was a better way to create a smart contract.
And I believe I’ve found the solution with Hardhat.
In my Web 3.0 article, I mentioned Smart Contracts as one of the most powerful tools for achieving Web 3.0 and as one of the factors that have led to Ethereum’s current success.
Disclaimer:This article will not go into the nitty-gritty technical details of Solidity. The goal is to show how to use Hardhat as the Solidity development environment.
Before Hardhat, there was Remix
Let’s talk a bit about Remix first.
What exactly is Remix? Remix is a smart contract development IDE. It’s likely the first thing you learn when learning smart contract development.

remix.ethereum.org
It has served its purpose admirably, whether for learning, prototyping, or development. Even though it is adequate, I want to look for something that better suits my needs.
Hardhat!
Hardhat is a development environment that streamlines compiling, deploying, debugging, and, my personal favorite, testing smart contracts.
This article will walk you through the steps of creating, compiling, testing, deploying, and verifying smart contract projects using Hardhat.
Article Outline
- Creating Project with Hardhat
- Implementing Smart Contract
- Automated Test with Hardhat
- Deploying with Hardhat Script
- Verifying Code on Blockchain Explorer (withHardhat Script)
1. Creating the project
Let’s start with an npm project, then install hardhat and create a TypeScript project with it.
npm init npm install --save-dev hardhat npx hardhat
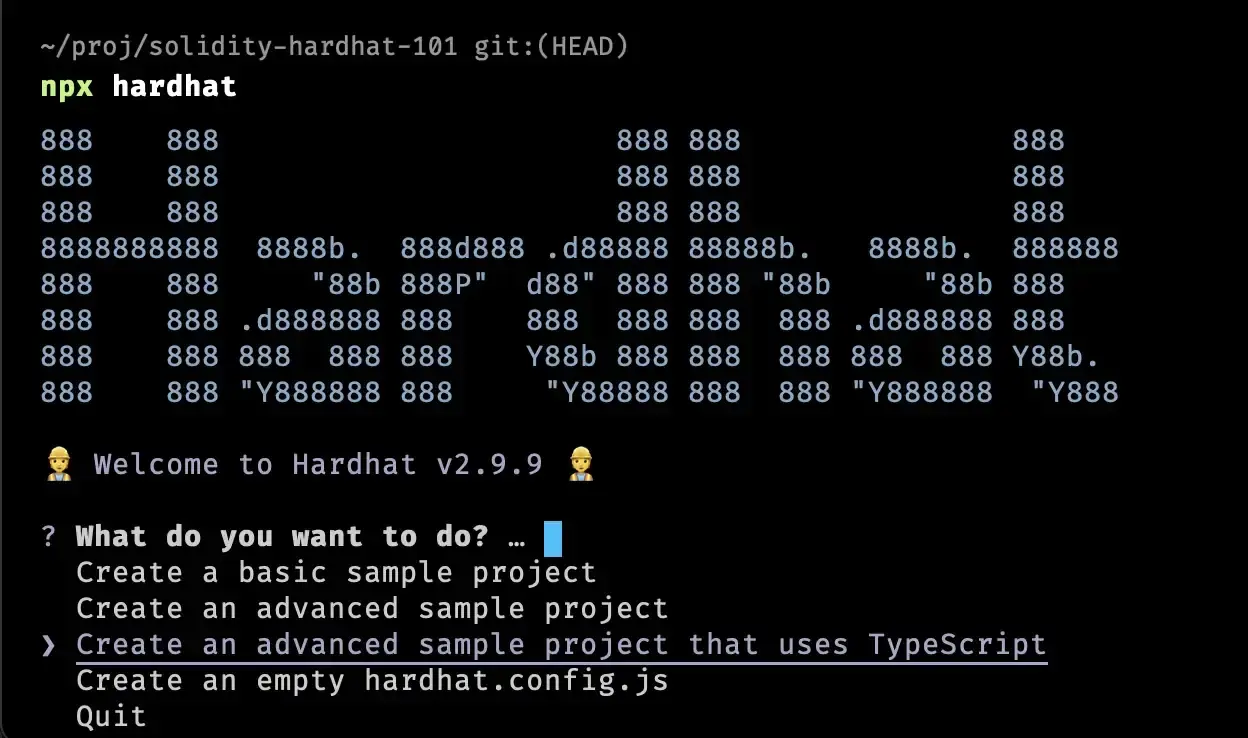
Select TypeScript when creating a sample project
Then the project structure should be like this:
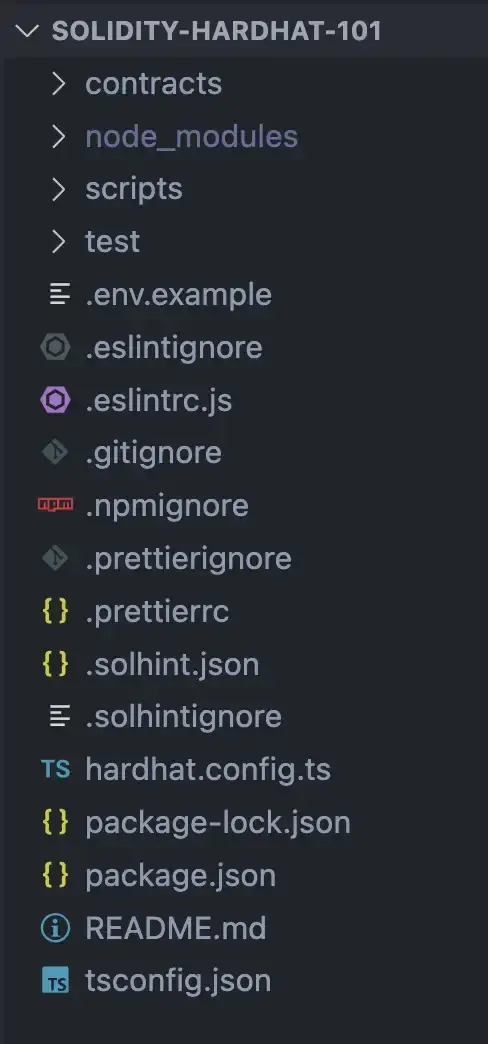
Project Structure
The meaning of each important files
hardhat.config.tscontracts/scripts/Directory for scripts, e.g., deploy scriptstest/Directory for automated test files
Change the test package.json
"scripts": {
    "test": "hardhat test"
}
Environment file
Create .env.env.example
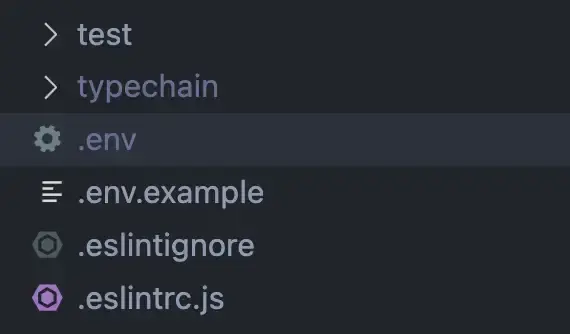
The real .env
Configure .env to the real values. I’ll be using Ethereum Ropsten as the network for this article. (For the ROPSTEN_URL using this site: rpc.info is a good way to find one)
This article was written when Ropsten was still alive. But it will be deprecated and shut down soon (Q4 2022), so you might need to use another network.Read more
🏁 Checkpoint #1: Project created
At this point, there should be a directory containing sample code, which you can test by running the following command:
npm run test
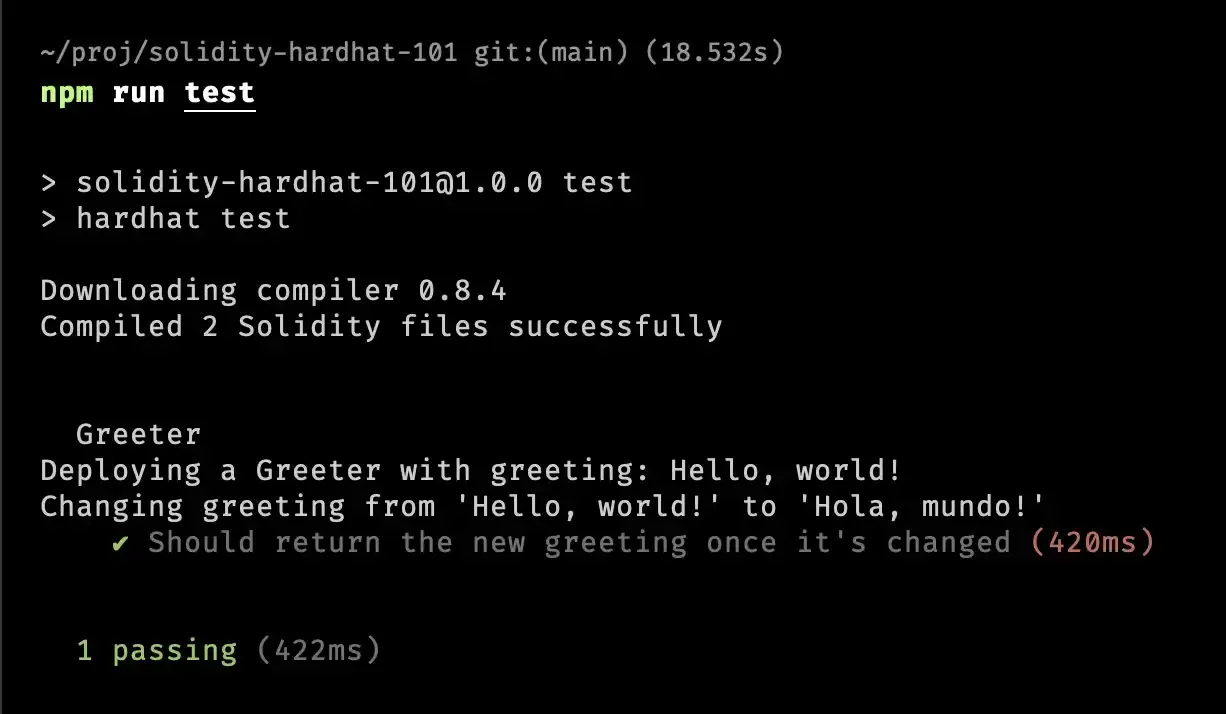
Test results
2. Implementing the contract
For this article, I’ll make a LoveLetter
Create LoveLetter.solcontracts/
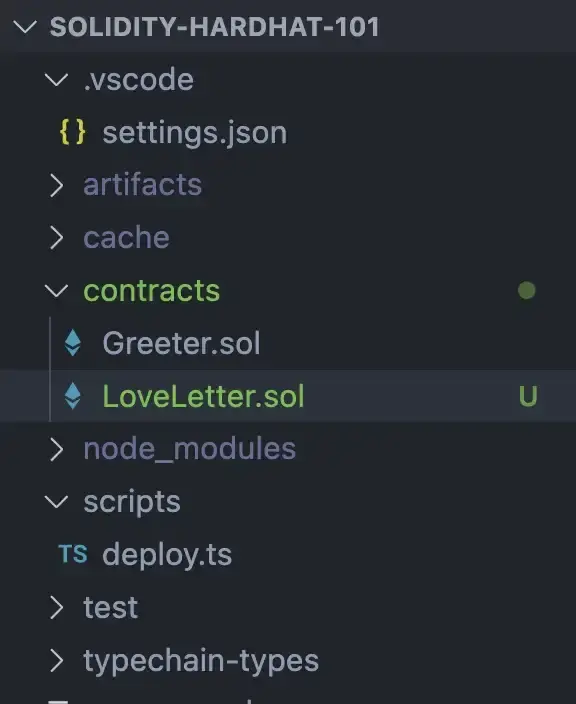
LoveLetter.sol in contracts
The requirements:
- Send letters containing Ether.
- Receive letters with Ether. It should only be callable by the receiver.
- Read the message contained within a letter. (We won’t be preventing others from reading the message.)
⚠️ Challenge1: Before reading the code below, try implementing it with the help from contracts/Greeter.sol.
🏁 Checkpoint #2: Contract implemented
At this point, the LoveLetter.sol
//SPDX-License-Identifier: Unlicense
pragma solidity ^0.8.0;

import "hardhat/console.sol";

contract LoveLetter {
    uint256 public totalLetters;
    mapping(uint256 => address) public senders;
    mapping(uint256 => address) public receivers;
    struct Letter {
        string message;
        uint256 etherAmount;
        bool opened;
    }
    mapping(uint256 => Letter) public letters;

    event Sent(
        address indexed from,
        address indexed to,
        uint256 indexed id,
        uint256 amount
    );
    event Opened(
        address indexed from,
        address indexed to,
        uint256 indexed id,
        uint256 amount
    );

    constructor() {
        totalLetters = 0;
    }

    function send(address to, string memory message)
        external
        payable
        returns (uint256 id)
    {
        id = totalLetters;
        senders[id] = msg.sender;
        receivers[id] = to;
        letters[id] = Letter({
            message: message,
            etherAmount: msg.value,
            opened: false
        });
        console.log("[send]", id, msg.value);
        totalLetters++;
        emit Sent(msg.sender, to, id, msg.value);
    }

    function open(uint256 id) external returns (string memory message) {
        require(receivers[id] == msg.sender, "Not receiver");
        require(!letters[id].opened, "Already opened");
        message = letters[id].message;
        letters[id].opened = true;
        uint256 amount = letters[id].etherAmount;
        console.log("[open]", id, amount);
        if (amount > 0) {
            payable(msg.sender).transfer(amount);
        }
        emit Opened(senders[id], msg.sender, id, amount);
    }

    function readMessage(uint256 id)
        external
        view
        returns (string memory message)
    {
        message = letters[id].message;
    }

    function checkOpened(uint256 id) external view returns (bool opened) {
        opened = letters[id].opened;
    }

    function getEtherAmount(uint256 id)
        external
        view
        returns (uint256 etherAmount)
    {
        etherAmount = letters[id].etherAmount;
    }

    function getSender(uint256 id) external view returns (address sender) {
        sender = senders[id];
    }

    function getReceiver(uint256 id) external view returns (address receiver) {
        receiver = receivers[id];
    }
}
Check the contract by running this command:
npx hardhat compile
The result should be something like this:

Next, let’s use my favorite features of Hardhat. Automated Test!
3. Testing the contract
Create the test file loveletter.tstest/.
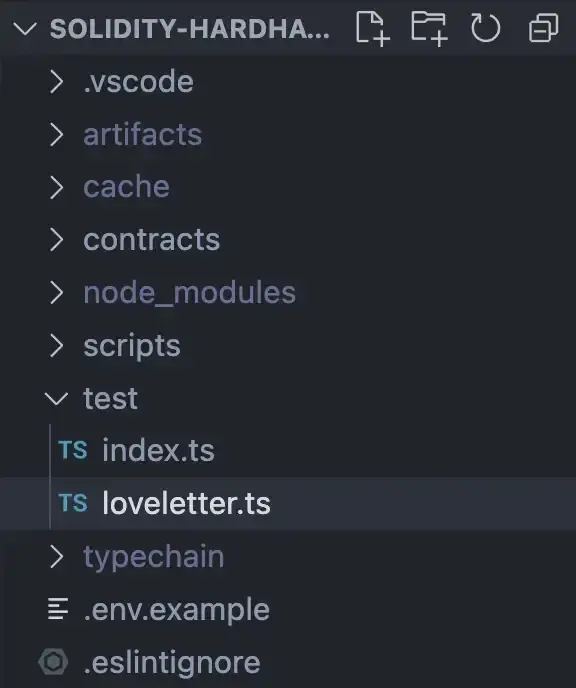
loveletter.ts in test/
Implement tests for these use cases:
- The contract can be deployed successfully.
- Send the letter successfully, then read the correct values from it.
- The letter can’t be opened by someone that’s not the receiver.
- The receiver opens the letter successfully, receiving the Ether within.
⚠️ Challenge2: Before reading the code below, try implementing it with the help from test/index.ts.
import { expect } from "chai";
import { Signer, utils } from "ethers";
import { ethers } from "hardhat";
import { LoveLetter } from "../typechain";

describe("LoveLetter", () => {
  let love: LoveLetter;
  let sender: Signer;
  let receiver: Signer;
  let stranger: Signer;
  before(async () => {
    const LoveLetterFactory = await ethers.getContractFactory("LoveLetter");
    love = await LoveLetterFactory.deploy();
    await love.deployed();
    const accounts = await ethers.getSigners();
    sender = accounts[0];
    receiver = accounts[1];
    stranger = accounts[2];
  });

  it("Should deployed and initiated", async () => {
    expect(await love.totalLetters()).to.equal(0);
  });

  it("Should send successfully", async () => {
    expect(
      await love.connect(sender).send(await receiver.getAddress(), "Love chu", {
        value: utils.parseEther("1"),
      })
    ).to.emit(love, "Sent");
    expect(await love.readMessage(0)).to.equal("Love chu");
    expect(await love.checkOpened(0)).to.equal(false);
    expect(await love.getSender(0)).to.equal(await sender.getAddress());
    expect(await love.getReceiver(0)).to.equal(await receiver.getAddress());
    expect(await love.getEtherAmount(0)).to.equal(utils.parseEther("1"));
  });

  it("Should error if open by stranger", async () => {
    expect(love.connect(stranger).open(0)).to.revertedWith("Not receiver");
  });

  it("Should open successfully", async () => {
    const before = await receiver.getBalance();
    const tx = await love.connect(receiver).open(0);
    expect(tx).to.emit(love, "Opened");
    const gas = (await tx.wait()).gasUsed.mul(tx.gasPrice || 0);
    const after = await receiver.getBalance();
    expect(after.sub(before).add(gas)).to.equal(utils.parseEther("1"));
  });
});
Running tests
Use the command:
npm run test
The result will be something like this:
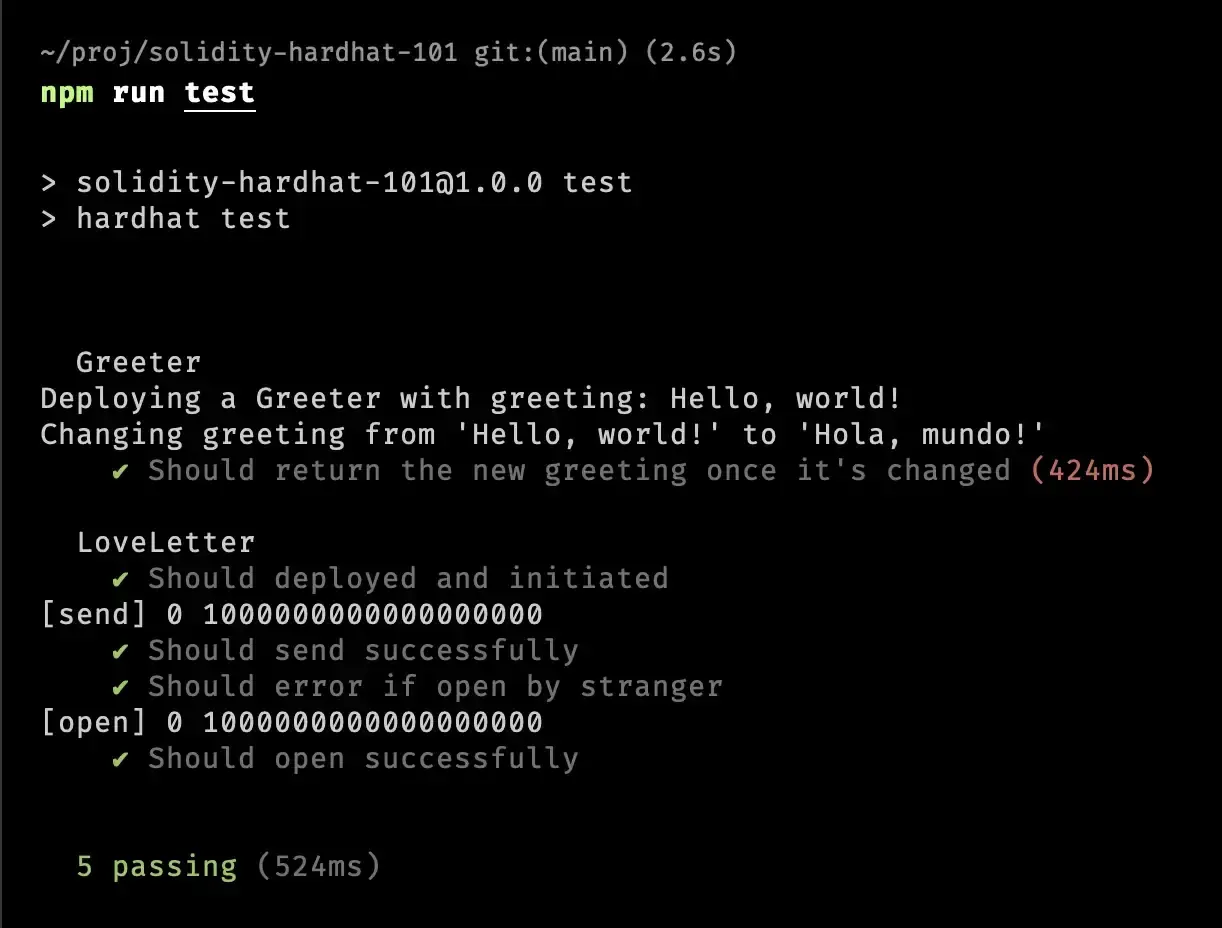
The result[send] 0 1000000000000000000 ... What is this?
And that would beconsole.log() for solidity!
This console.log is inside send function in my implementation of the contract. Read more about console.log
🏁 Checkpoint #3: Contract tested
At this point, the contract has been tested. Next, let’s deploy it onto the network!
⚠️ Challenge3: Add two test cases:1. Revert the transaction if the receiver tries to open an opened letter.2. Send a letter (which would has an id of 1) successfully.My implementation will be in the GitHub repository at the end of this article.
4. Deploying the contract
⚠️ Challenge4: Try deploying the contract on Remix first!
Deploy with Hardhat script
Create the script at scripts/deploy-loveletter.ts
⚠️ Challenge5: Try implementing the script with scripts/deploy.ts as an example.
import { ethers } from "hardhat";

async function main() {
  const LoveLetter = await ethers.getContractFactory("LoveLetter");
  const loveLetter = await LoveLetter.deploy();

  await loveLetter.deployed();

  console.log("LoveLetter deployed to:", loveLetter.address);
}

main().catch((error) => {
  console.error(error);
  process.exitCode = 1;
});
Then run the command below for deploying:
npx hardhat run scripts/deploy-loveletter.ts --network ropsten

Result of the deployment
🏁 Checkpoint #4: Contract deployed
At this point, the smart contract is deployed on the blockchain.
You can see your deployed contract on https://ropsten.etherscan.io/ (or whatever blockchain explorer for the network of your choice)
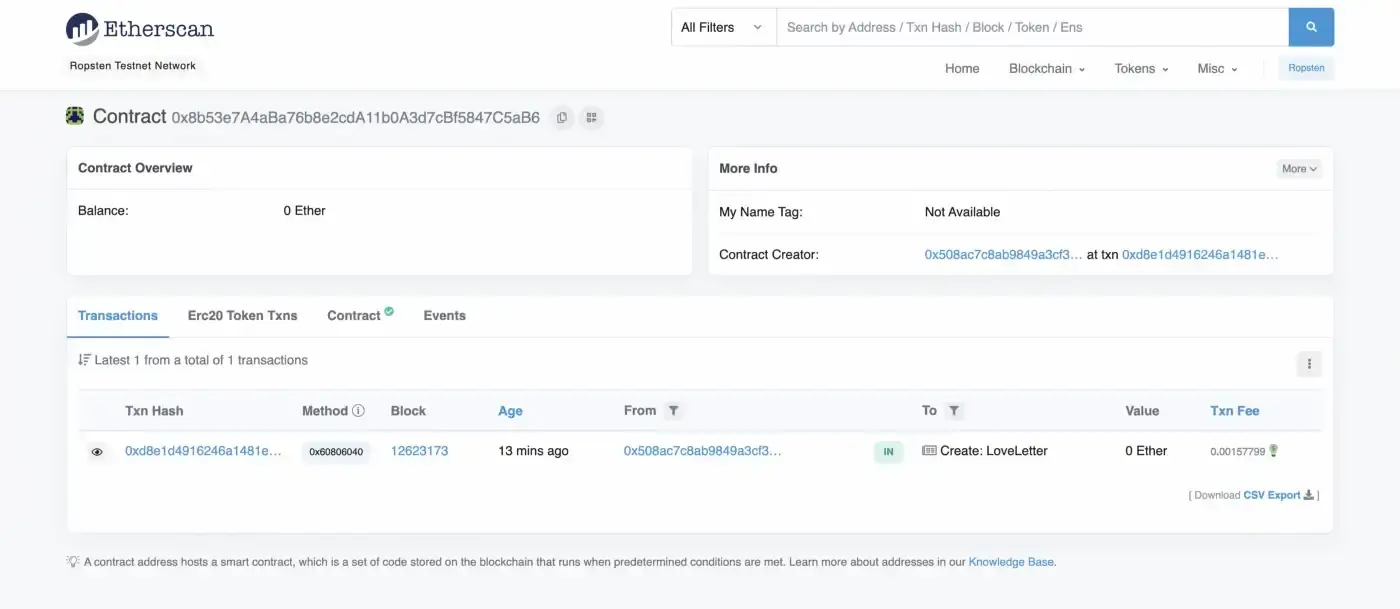
Contract is on ropsten.etherscan.io !
A thing might be a little different for you, namely the Contract tab without the green checkmark.
The checkmark indicates that the contract has been verified with readable source code. So let’s go and do that!
5: Verifying the source code
Even though anyone can deploy smart contracts on the blockchain (Permissionless) and see the code of all smart contracts. There’s a catch.
The code is a bytecode, which is not human-readable.

Bytecode of the contract
If contract developers want others to be able to read the source code, they will have to verify the contract with the original source code first.
And with hardhat, doing so is easier than ever!
npx hardhat verify --network ropsten {{contractAddress}}
Now, anyone will be able to read the code!
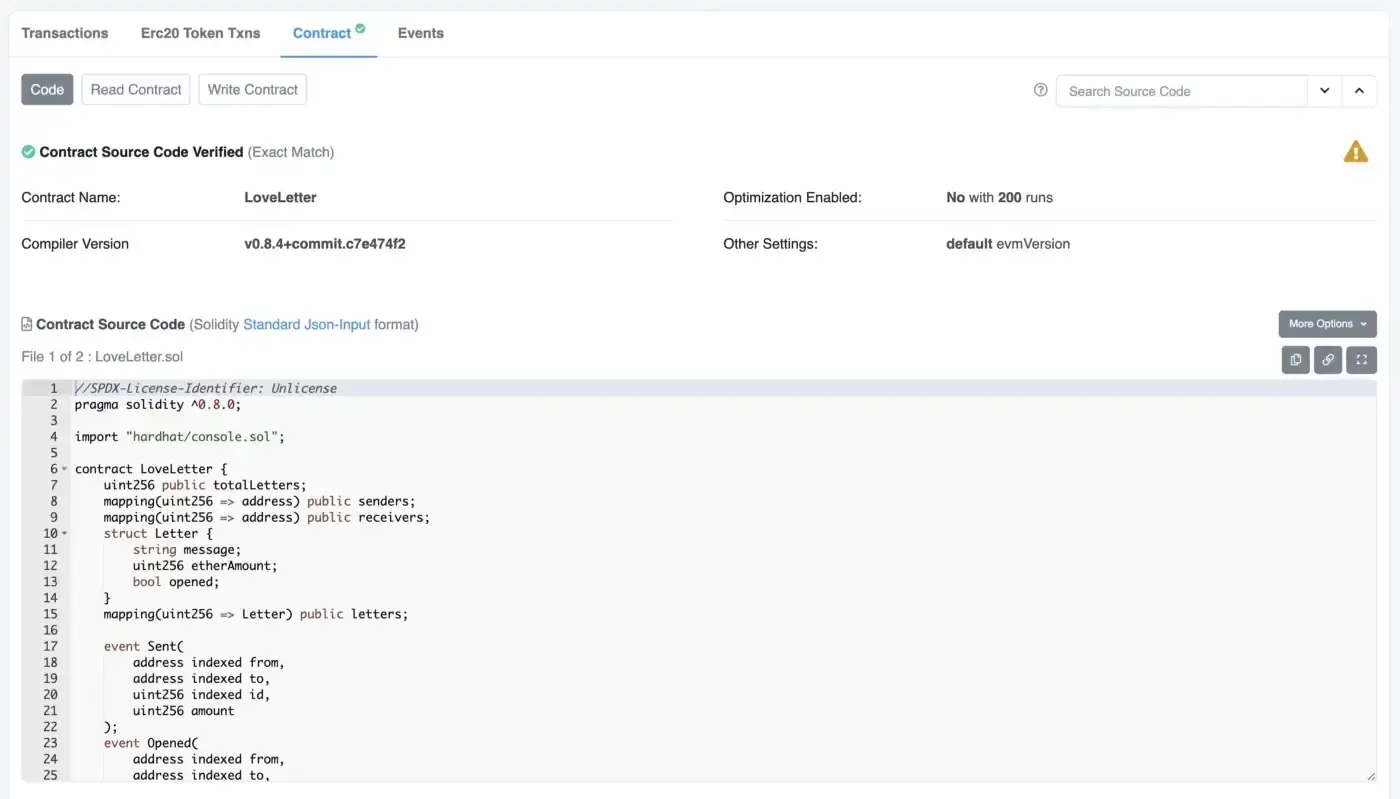
Verified source code⚠️ Challenge6: Try verify the code on blockchain explorer itself.
🏁 Checkpoint #5: Contract code verified
At this point, we have a tested, deployed, and verified contract on the network!
⚠️ Challenge7: Try Deploy & Verify on mainnet. The process is exactly the same, just changing things in .env and sometinkering with hardhat.config.ts
🏁 Done! 🏁
To recap, here are the things we’ve done in this article:
- Creating Project with Hardhat
- Implementing Smart Contract
- Automated Test with Hardhat
- Deploying with Hardhat Script
- Verifying Code on Blockchain Explorer (with Hardhat Script)
Thank you for reading, see you later in the next article!
